How to make Diaphonization specimen?
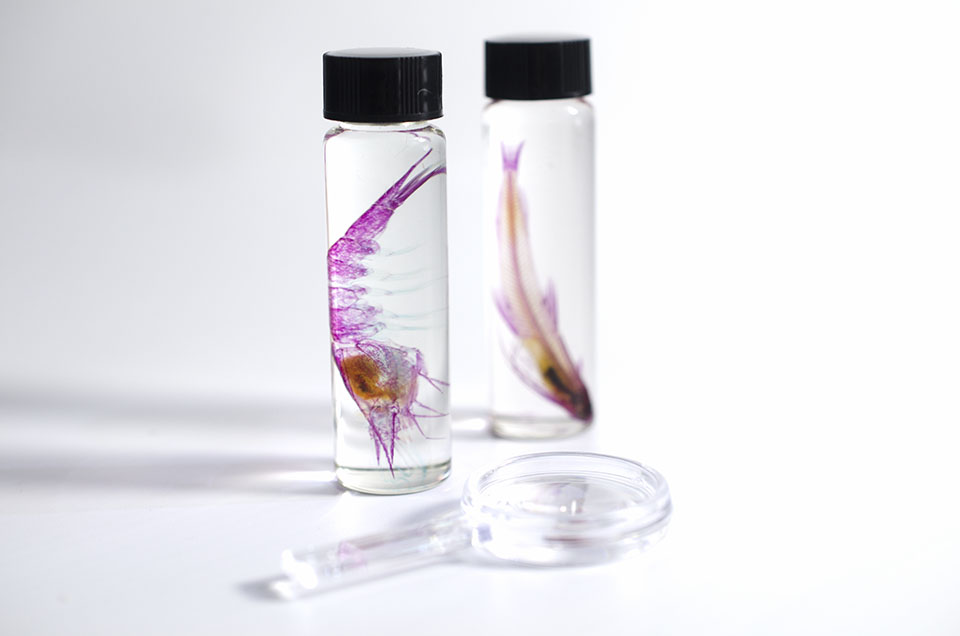
What is Diaphonization specimen?
It is a unique biological preservation technique originally used for scientific research. After an organism dies, various chemicals (alcohol, potassium hydroxide, enzymes, and dyes) are used to stain the bones and clear the muscle without damaging the body's integrity. The final specimen is preserved in glycerin.
Each specimen is one-of-a-kind, influenced by the biological structure and the specific environment during production—just like you and me.

To start, you will need the following tools, or you can simply purchase a "KAIRU marine Lab DIY Kit" which has everything you need!
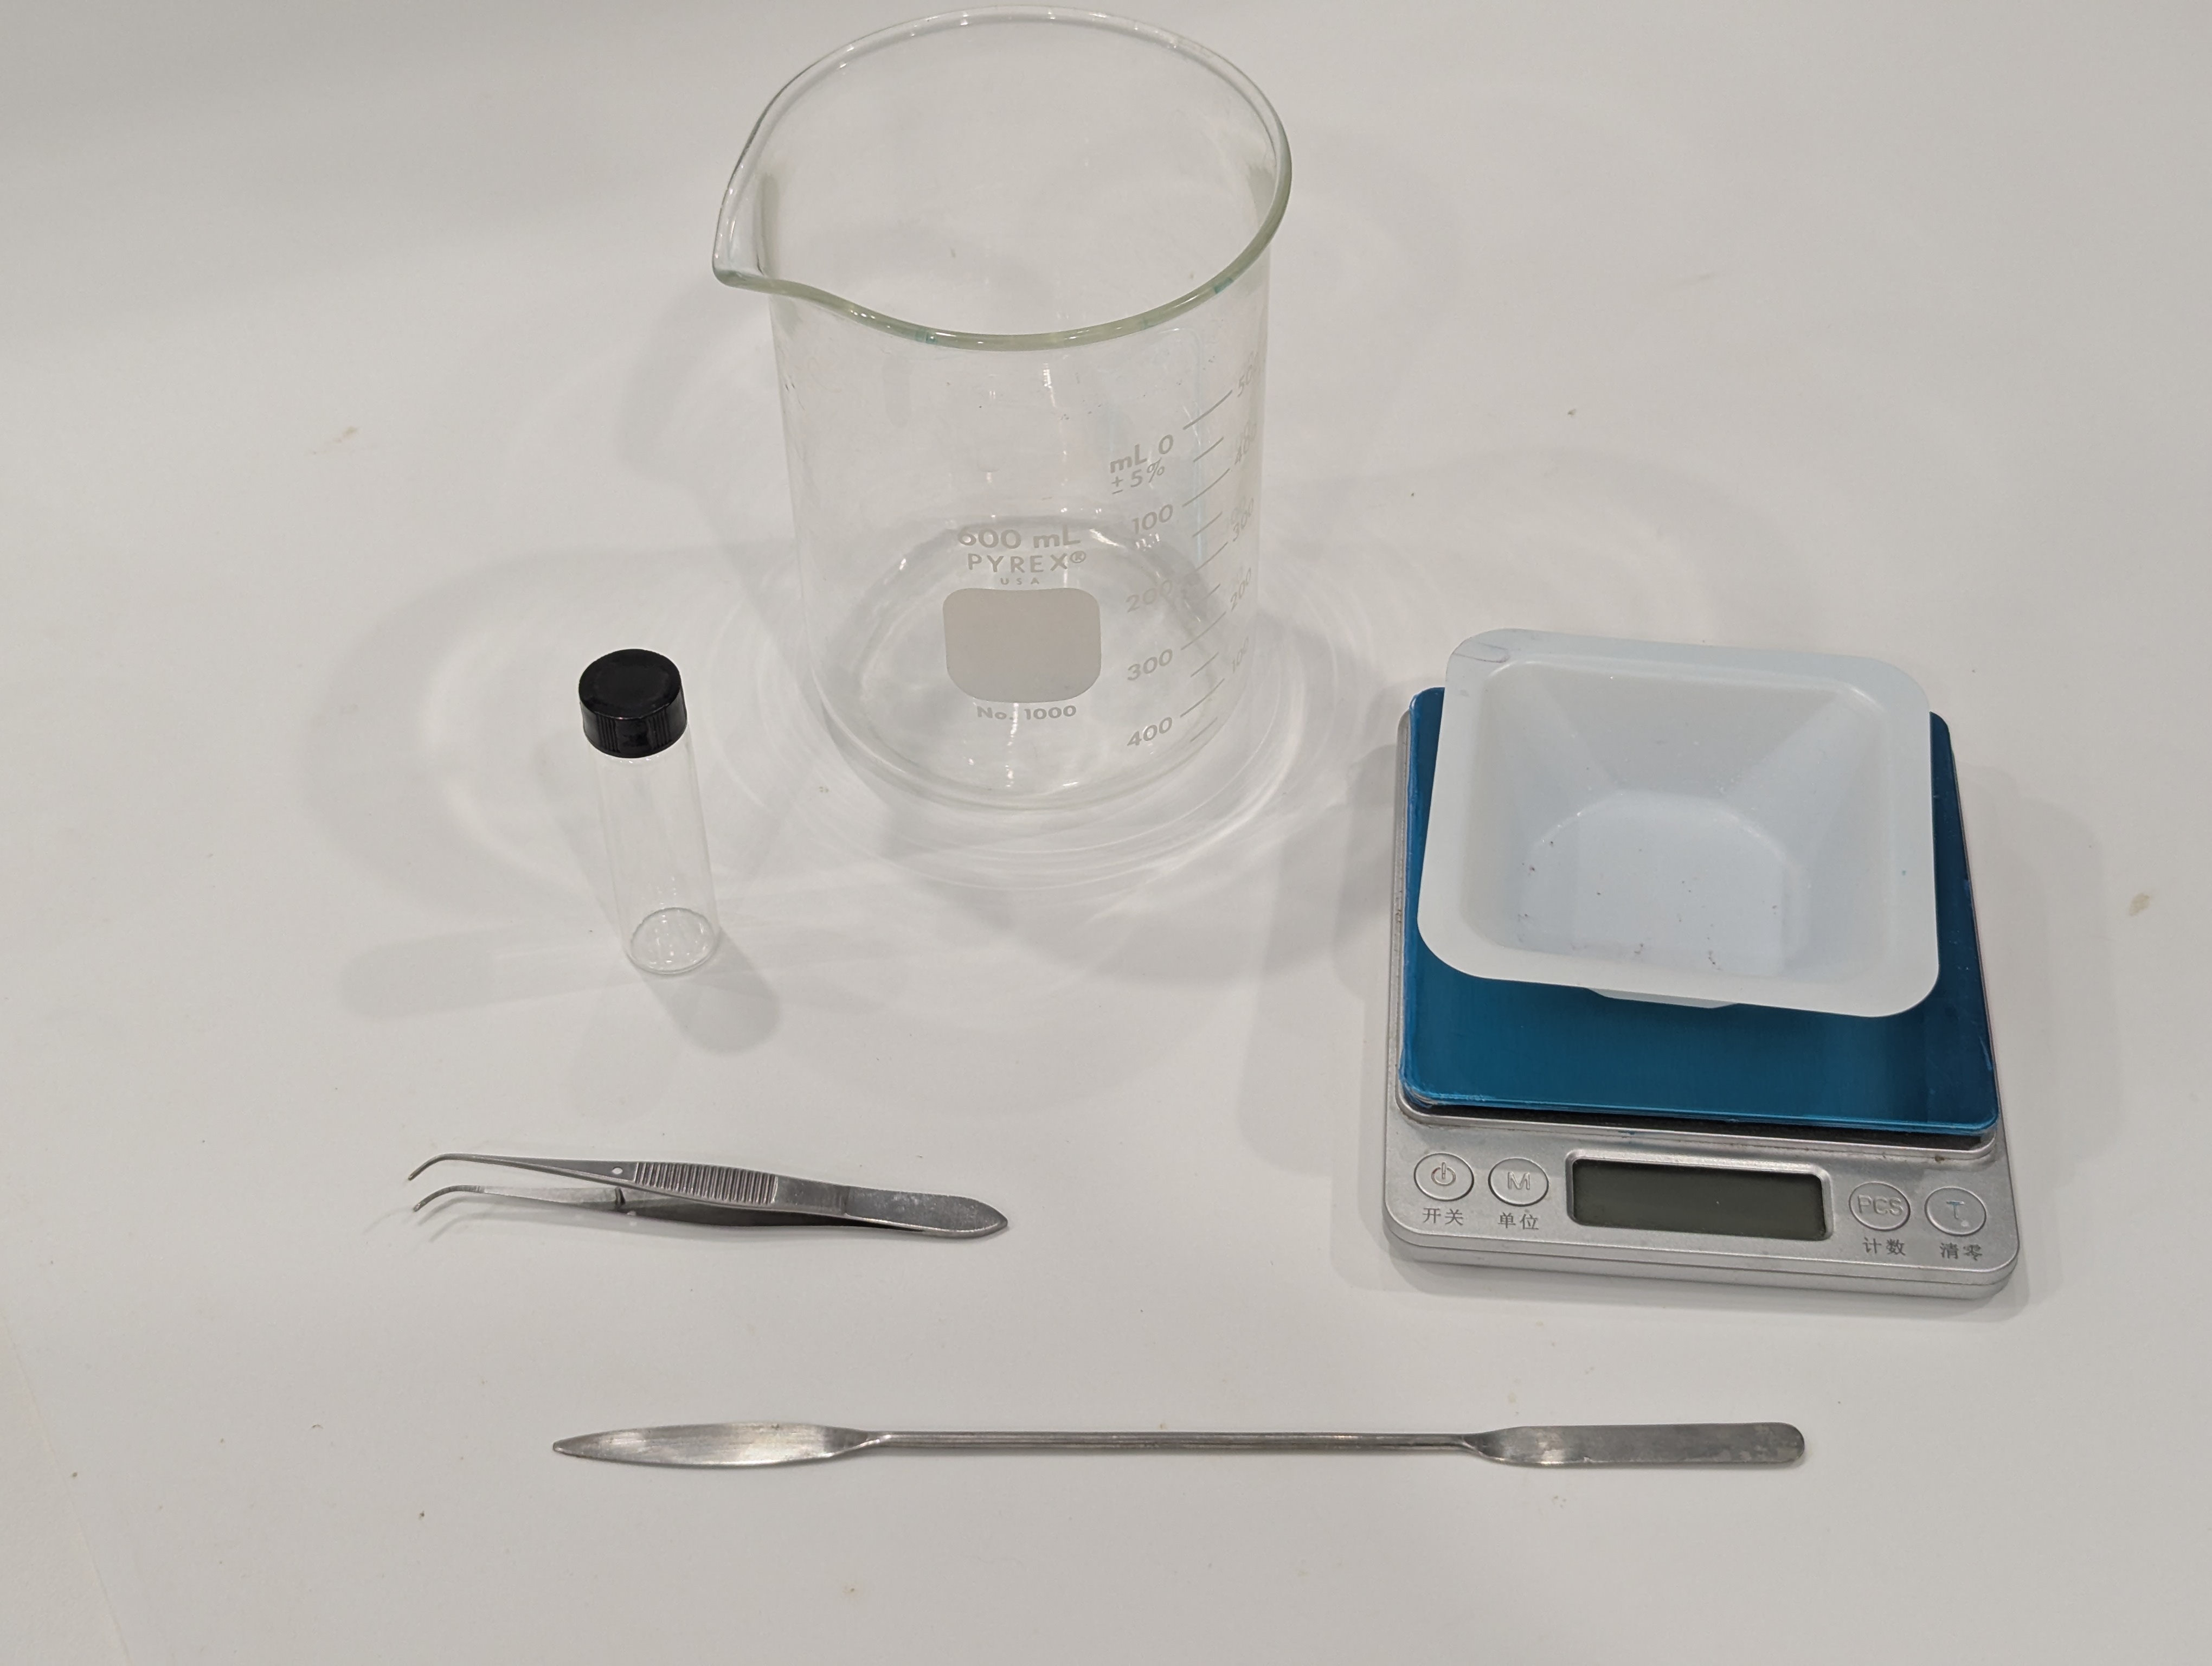
Tools
- Containers: Specimen bottles, Beakers, Graduated cylinders .
- Precision: Electronic scale ( min 0.1g).
- Handling: Tweezers , Droppers, Scalpel , Stirring rod, Weighing paper.
- Environment: Constant temperature equipment (30-50°C, e.g., food dehydrator or sous-vide).
- Safety: Masks , Gloves.
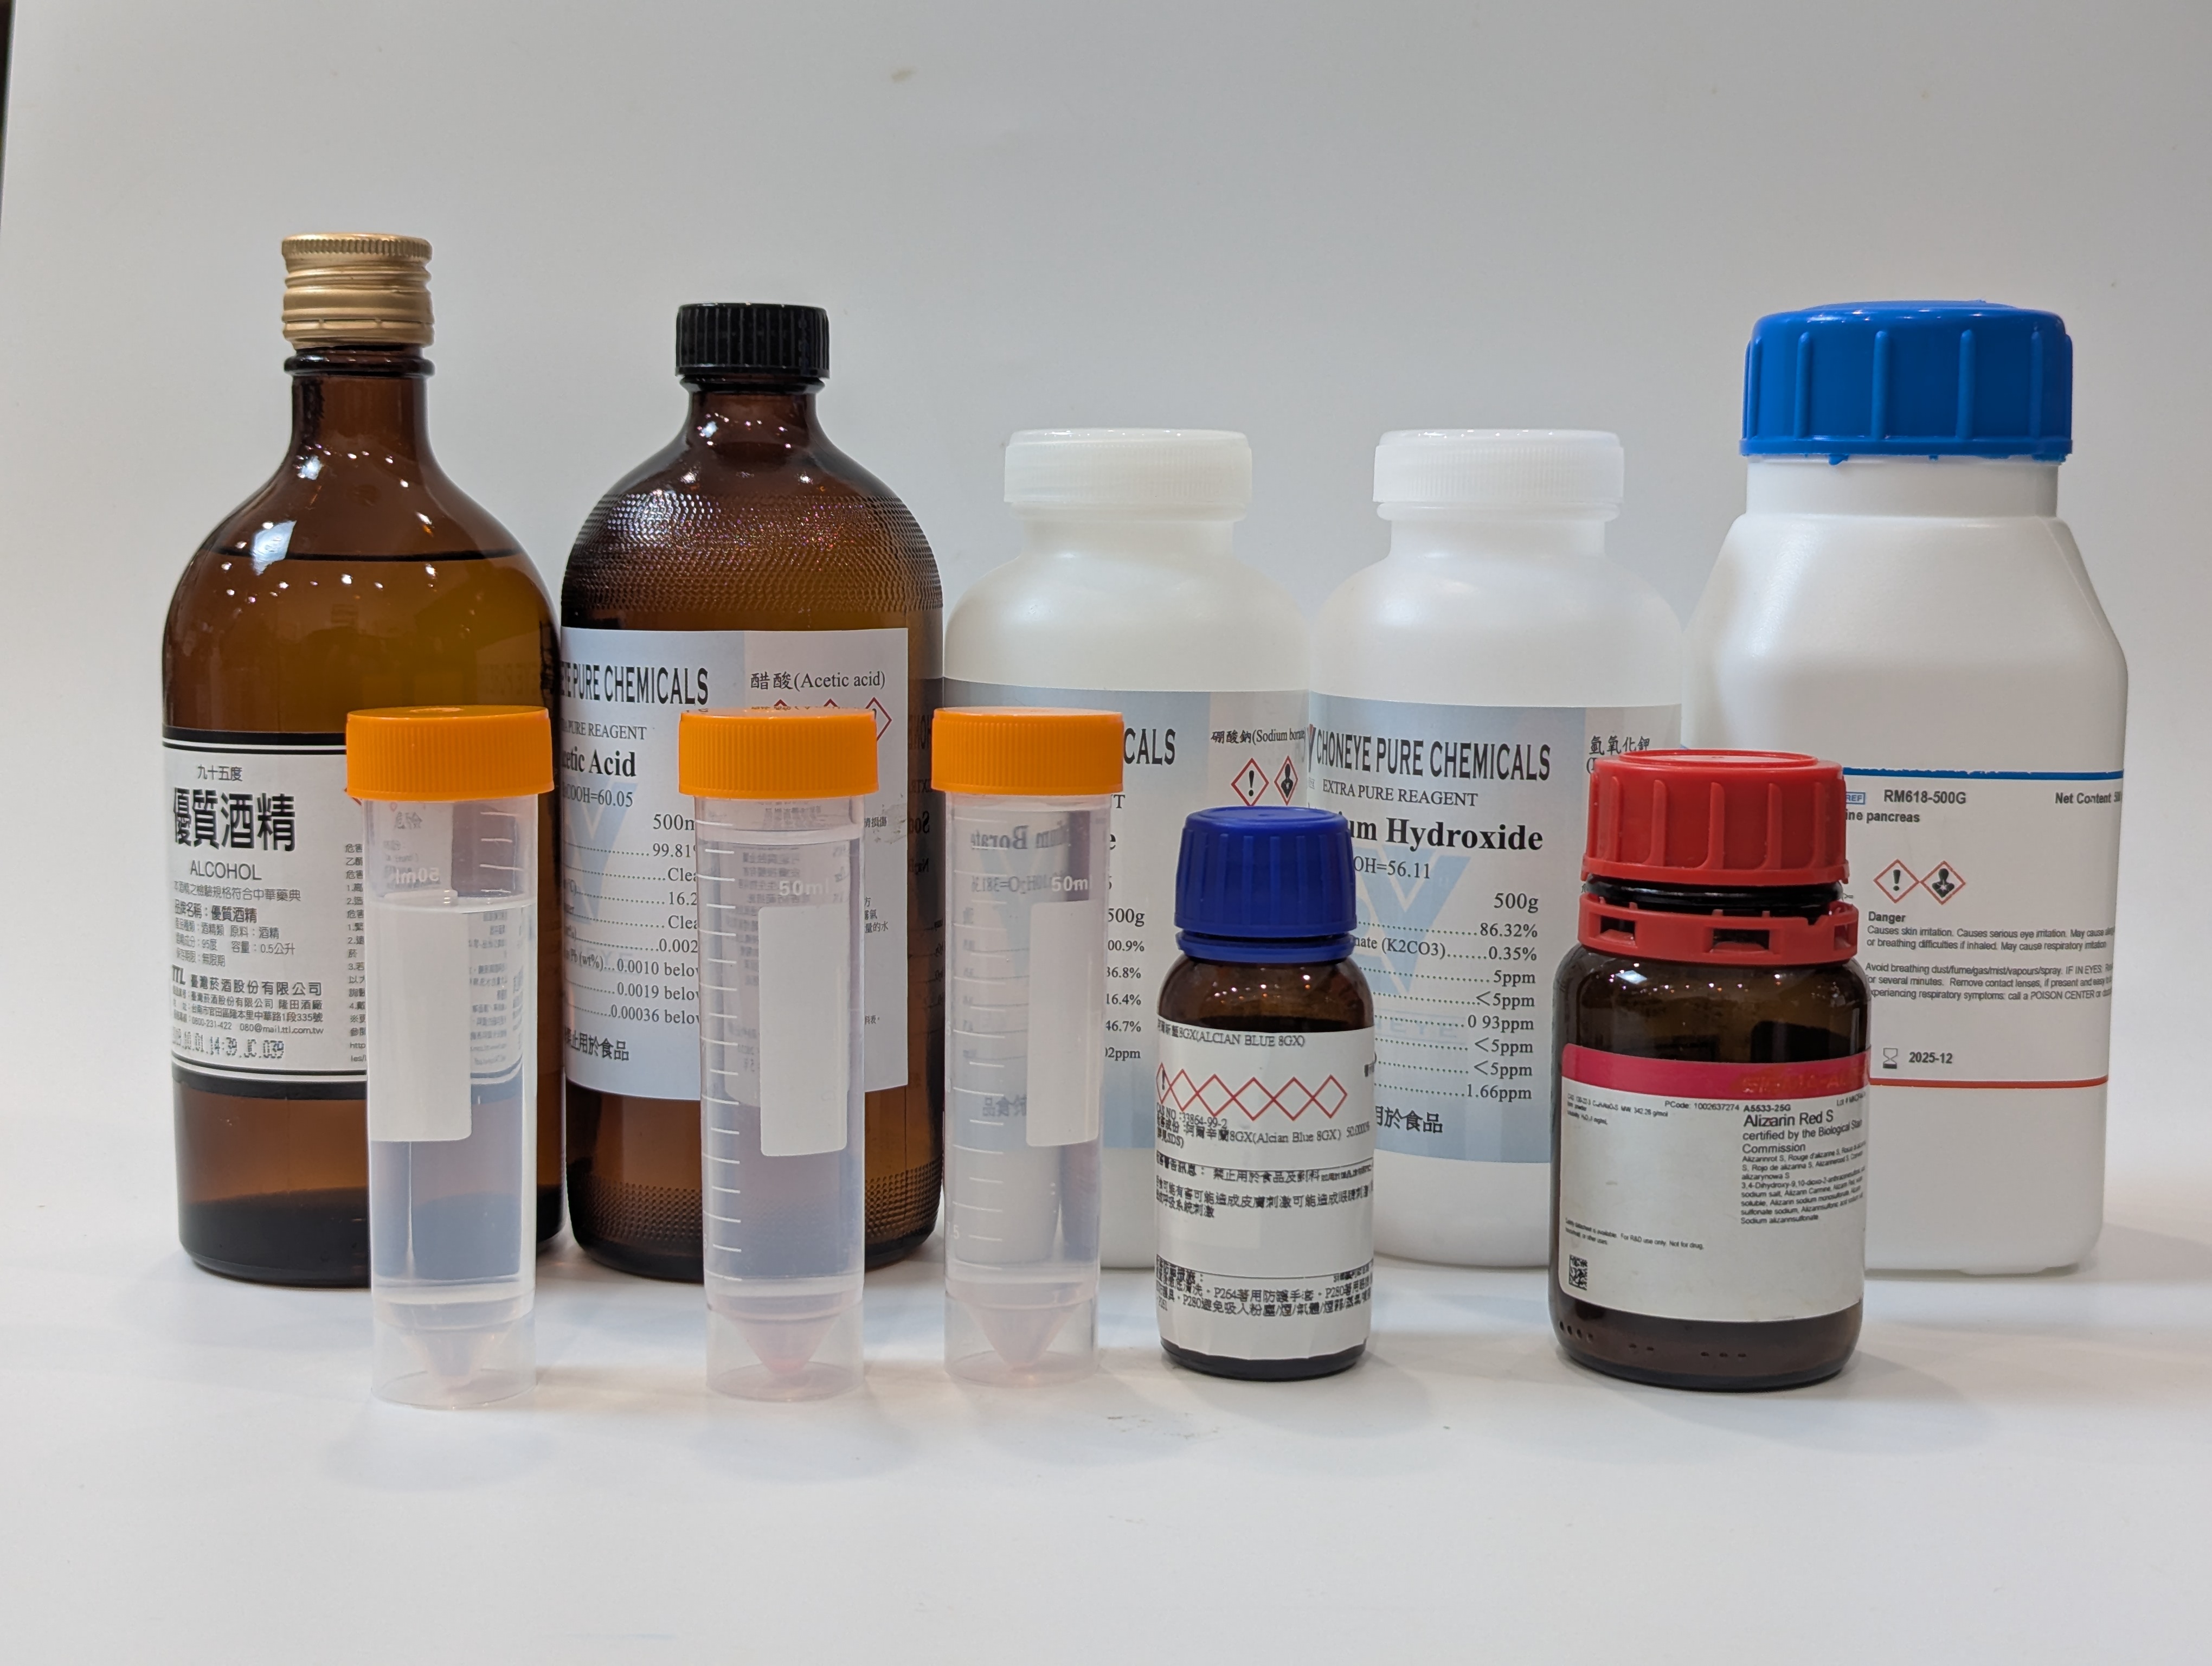
Chemicals
- 10% Formalin- Fixation
- 0.1% Hydrogen Peroxide - Bleaching
- 95% Alcohol- Dehydration
- 0.5% Potassium Hydroxide/KOH - Clearing/Staining base
- Trypsin - Muscle clearing
- Sodium Borate/Borax - Buffer
- Alcian Blue- Cartilage stain
- Glacial Acetic Acid - Staining catalyst
- Alizarin Red- Hard bone stain
- Pure Glycerin Final preservation
Step 1: Specimen Fixation (Preservation)
We use formalin to preserve the biological tissues. This stage must be executed very thoroughly to ensure the specimen is completely saturated for effective preservation. For typical small fish specimens, we recommend soaking in formalin for 3 to 7 days. For larger organisms, a longer soaking period is advised; otherwise, there is a risk of mold or decay during the production process! The recommended amount of formalin is 1.5 to 2 times the volume of the specimen, and you must ensure the formalin completely covers your specimen. (If you are using our DIY kit, you may skip directly to the next step.)
Step 2: Washing away Formalin
Soak the fixed specimen in fresh water or rinse it under running water. The soaking time can range from 30 minutes to an hour, or even overnight—any of these options are fine. The key is to ensure that the formalin is thoroughly washed out; this prevents a persistent, unpleasant chemical odor during the subsequent steps of the process.
Step 3: Bleaching and Decolorization
Soak the preserved specimen in a 0.1% Hydrogen Peroxide solution. The duration of this step depends on the darkness of the specimen's surface pigments. It is crucial to observe the specimen regularly during this process to ensure that any air bubbles generated do not damage or distort the specimen's body. (If you are using our DIY kit, you may skip this step).
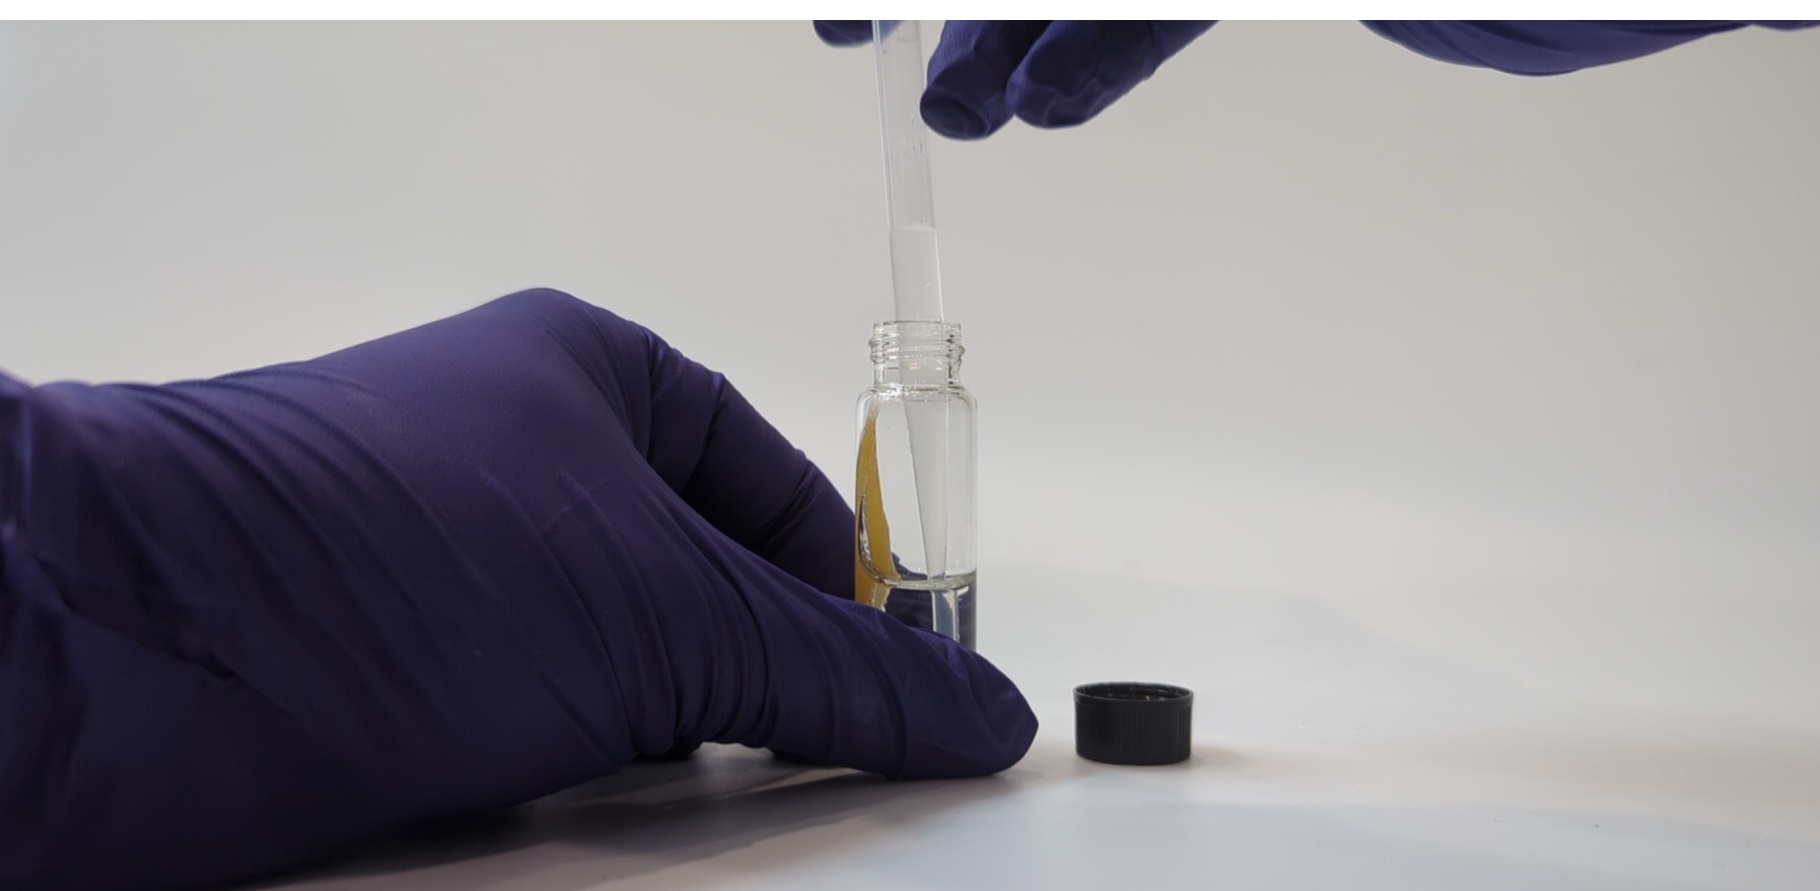
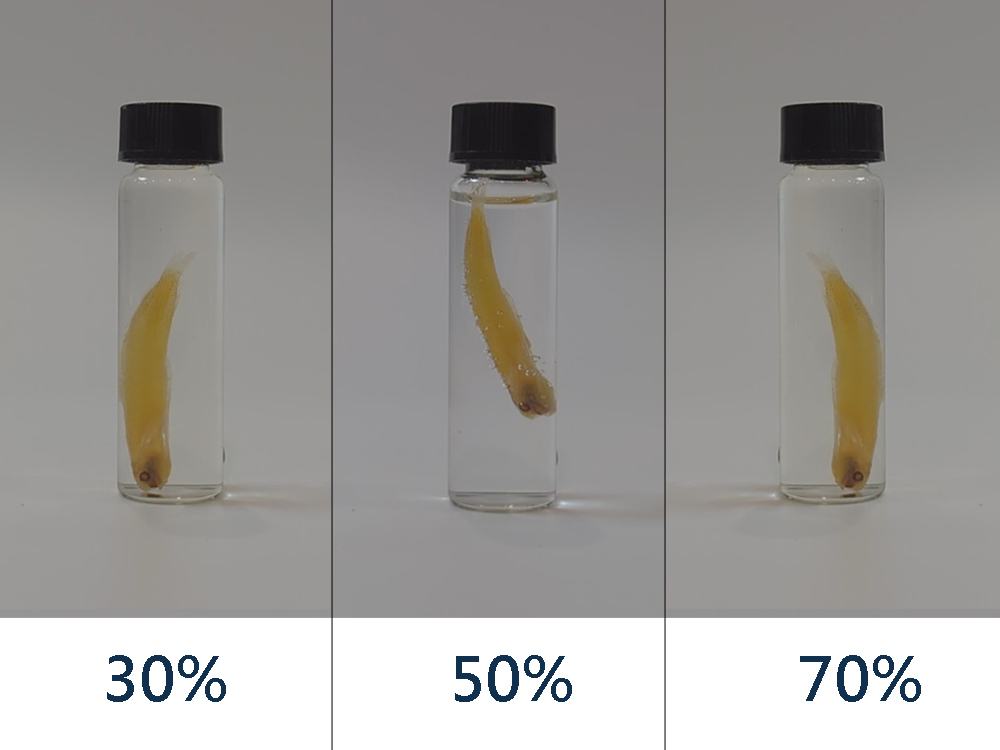
Step 4: Alcohol Exchange
Before the specimen enters the staining phase, it must be placed in an environment suitable for the dyes to take effect. This involves slowly replacing the water within the specimen's tissues with alcohol. The process moves gradually from a low concentration of alcohol (30%) to a high concentration (95%). Since no visible changes can be observed from the outside during this stage, the process is controlled by timing. We recommend a minimum of 30 minutes for each concentration stage, though the soaking time should be adjusted based on the size and volume of the specimen.
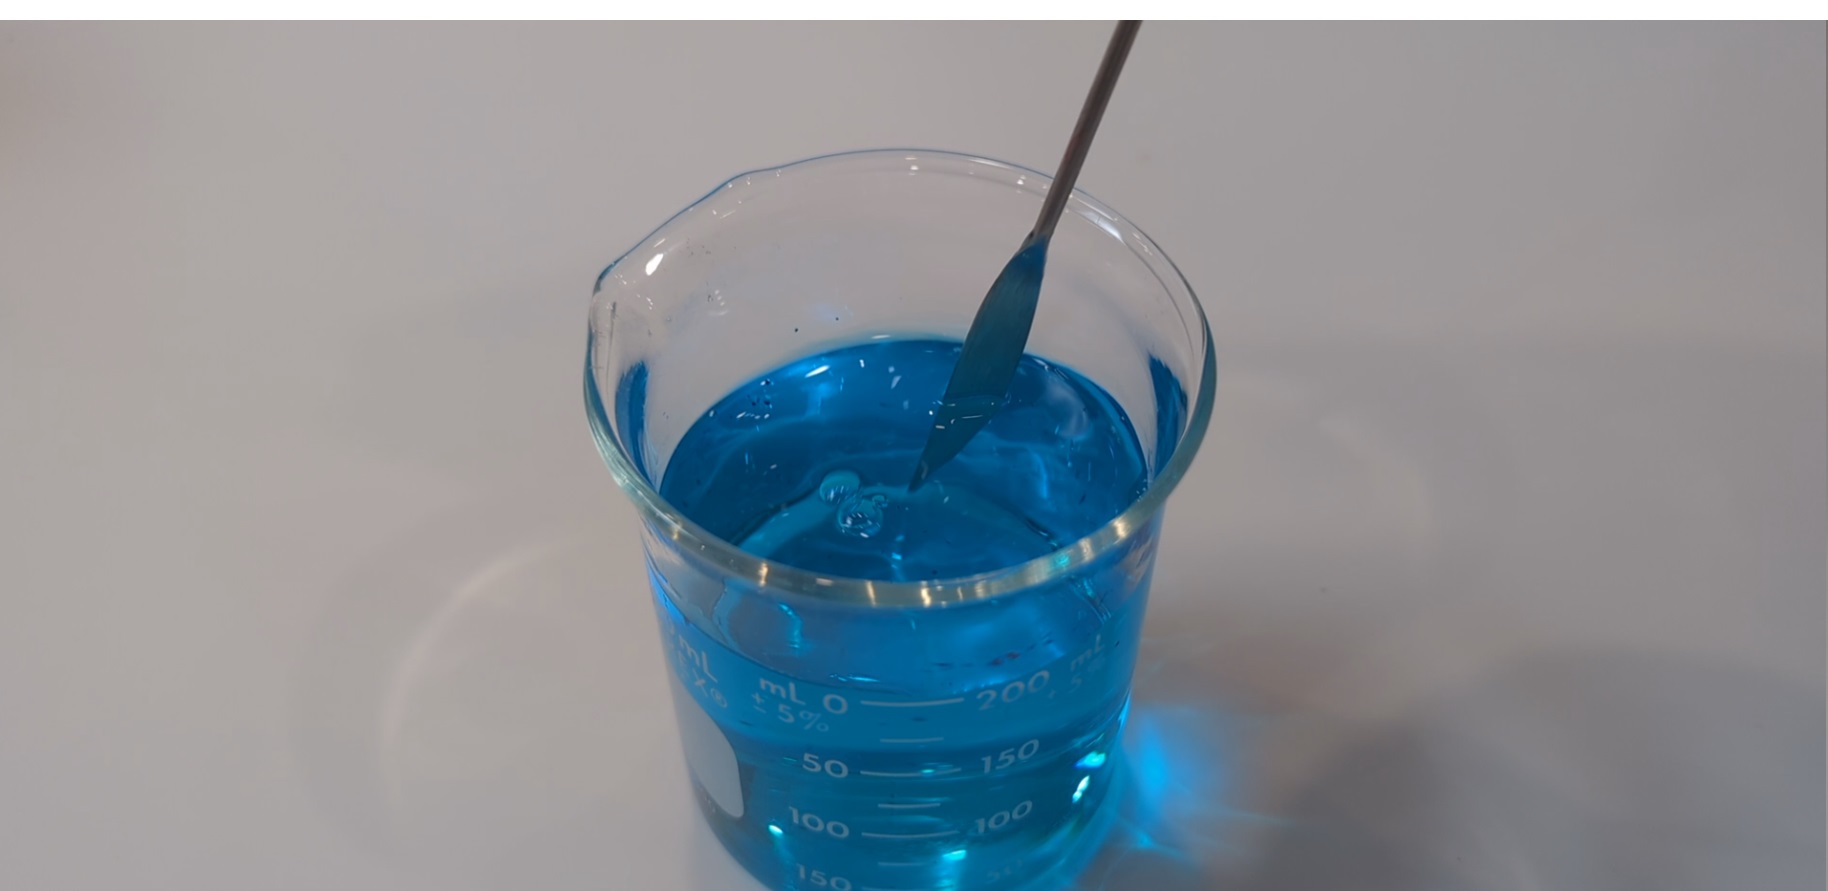
Step5: Cartilage Staining (Blue)
Mix Alcian Blue with Glacial Acetic Acid (approx. 1/4 of the alcohol volume). This requires a cold environment to work effectively, so place the jar in the refrigerator. Small specimens usually take 1–2 days.
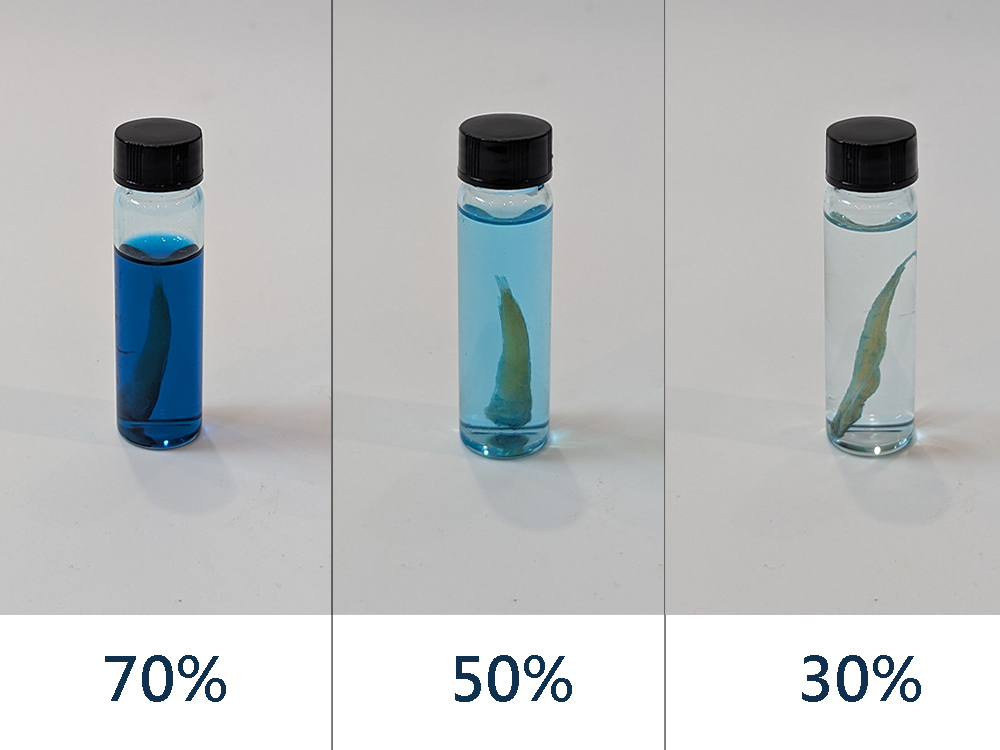
Step6:Rehydration (Clearing Dye)
Move from high-concentration alcohol back down to pure water. You will see the blue dye in the liquid fade, but the blue on the specimen remains.
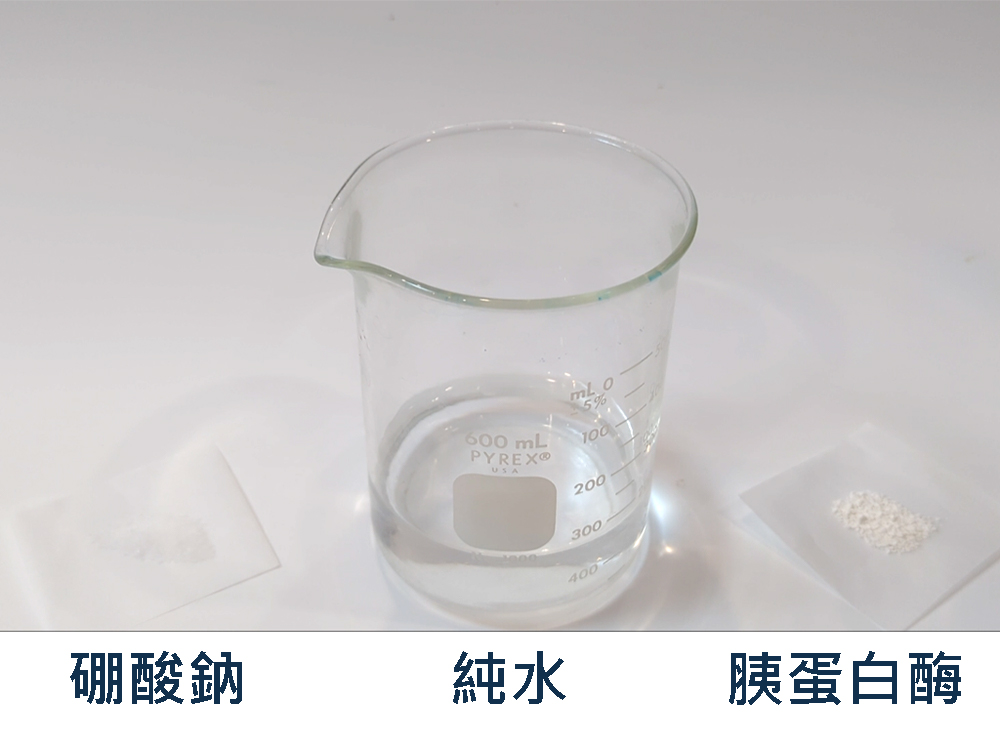
Step 7: Enzyme Preparation (Enzymatic Clearing)
The enzymatic clearing stage utilizes Trypsin mixed with Sodium Borate (Borax) and pure water (or similar agents) to digest the protein structures, achieving a near-transparent effect.
-
Mixing Ratio: 100g Water : 2.4g Sodium Borate : 1g Trypsin.
In a standard transparent biological specimen, the muscle does not completely disappear; however, if the specimen is over-soaked, there is a risk of irreversible damage or structural disintegration.
Step 8: Constant Temperature Enzyme Reaction
The optimal working temperature for the Trypsin and Sodium Borate mixture is approximately 37°C. Utilizing constant temperature equipment can make the process significantly more efficient, achieving twice the result with half the effort. For home setups, you can use a sous-vide immersion circulator or a food dehydrator. If such equipment is unavailable, you may also utilize natural sunlight or the waste heat generated by household appliances.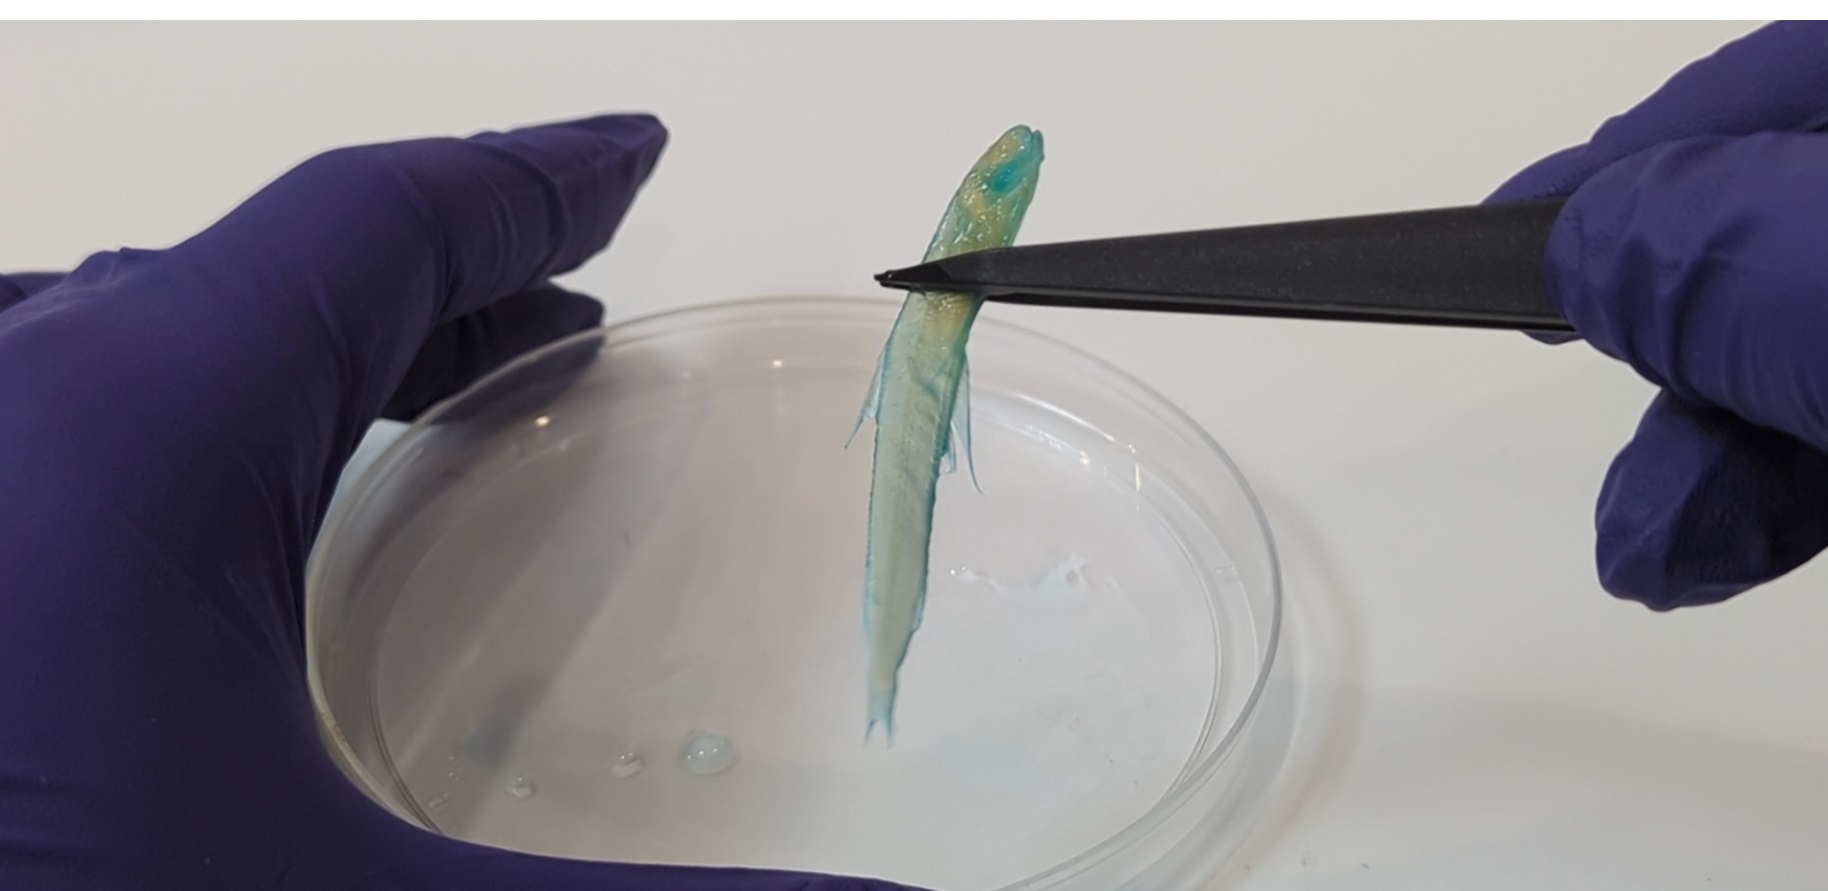
Step 9: Transitioning to Potassium Hydroxide (KOH)
In addition to enzymes, Potassium Hydroxide (KOH) also helps enhance the transparency of the specimen. Furthermore, KOH serves as the essential medium for the upcoming red staining stage. Place the specimen into the KOH solution and allow it to soak for a period of time before proceeding to the hard bone staining phase.
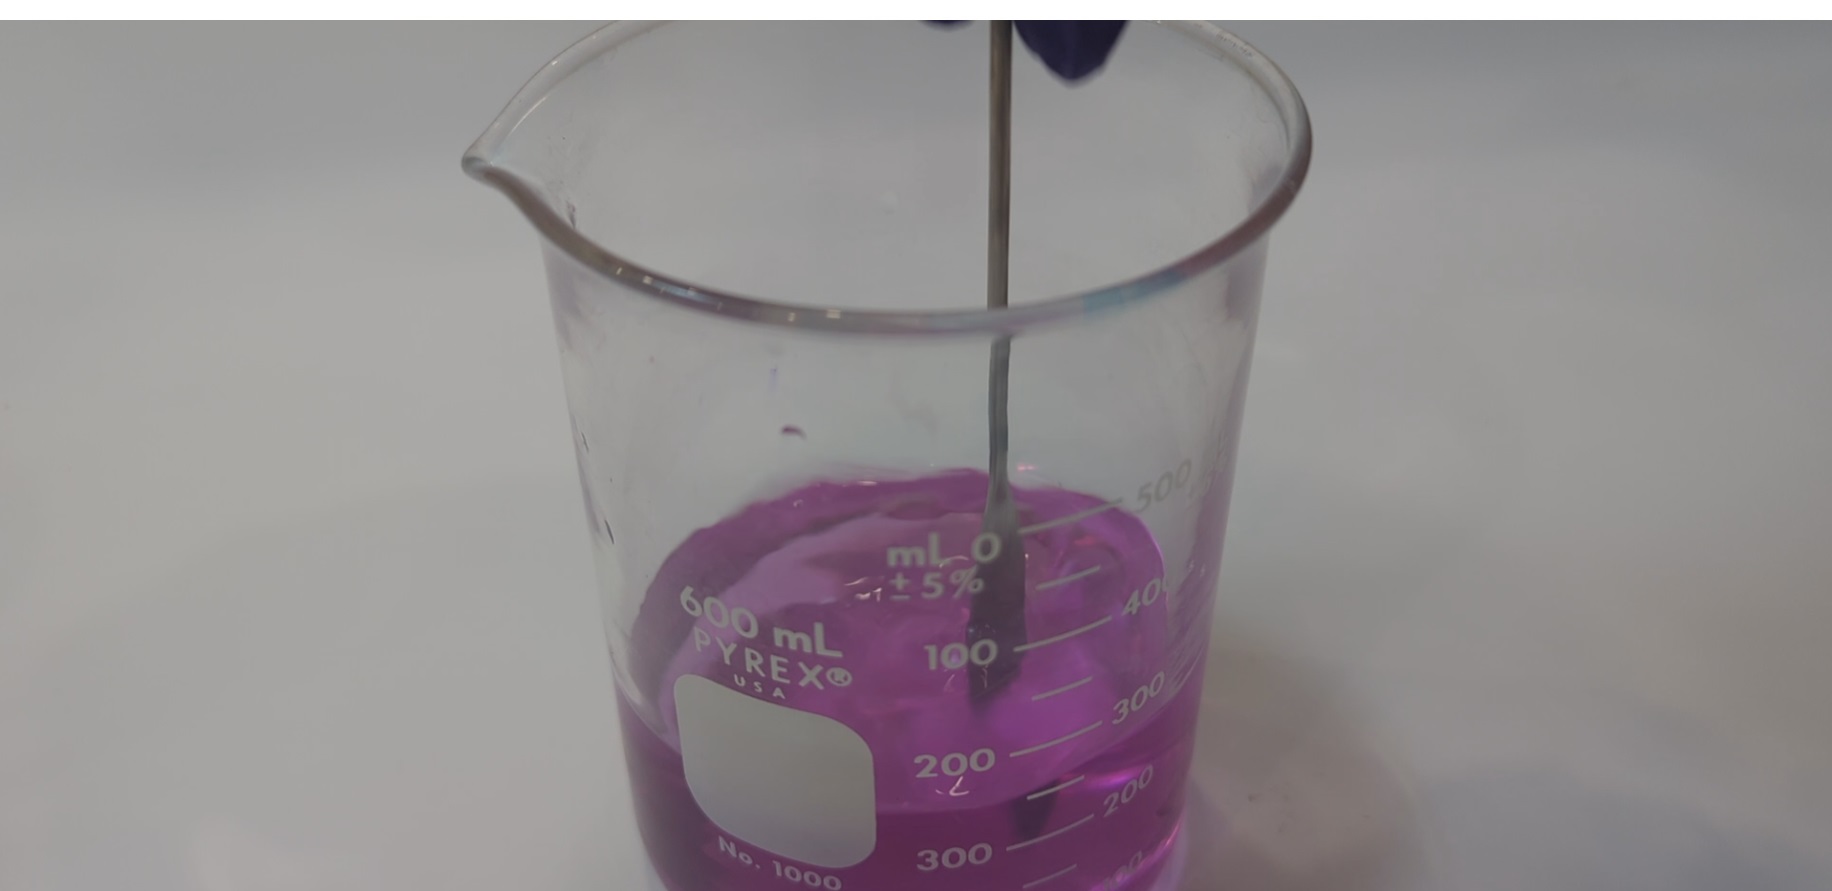
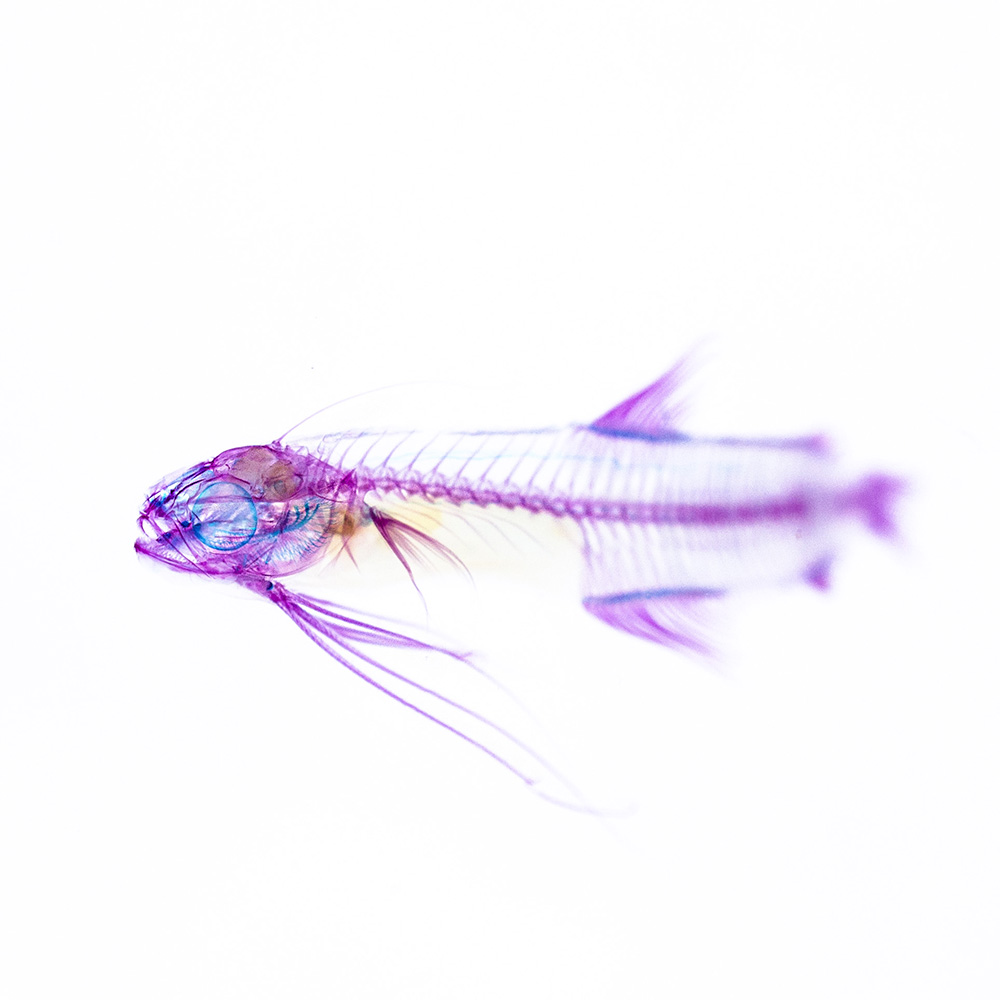
Step 10: Hard Bone Staining – Red Dye
In this stage, the Alizarin Red dye reacts with the specimen to specifically stain the hard bone structures (such as the spine and fins). Similar to the blue staining process, the recommended duration for this step is 1 to 2 days.
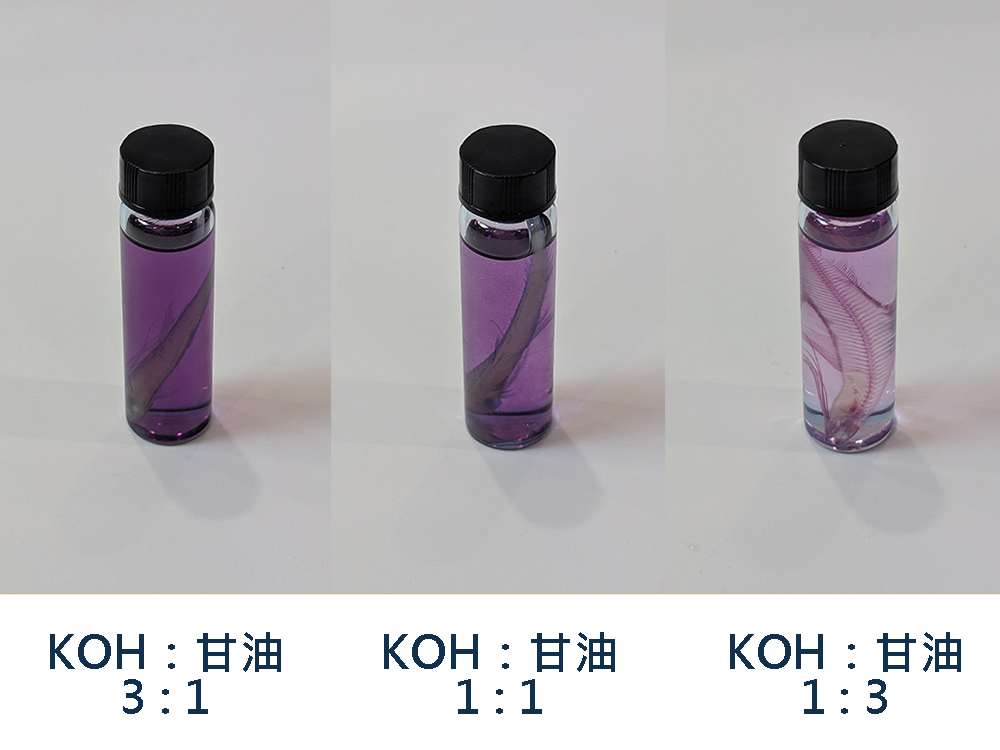
Step 11: Transitioning to Glycerin
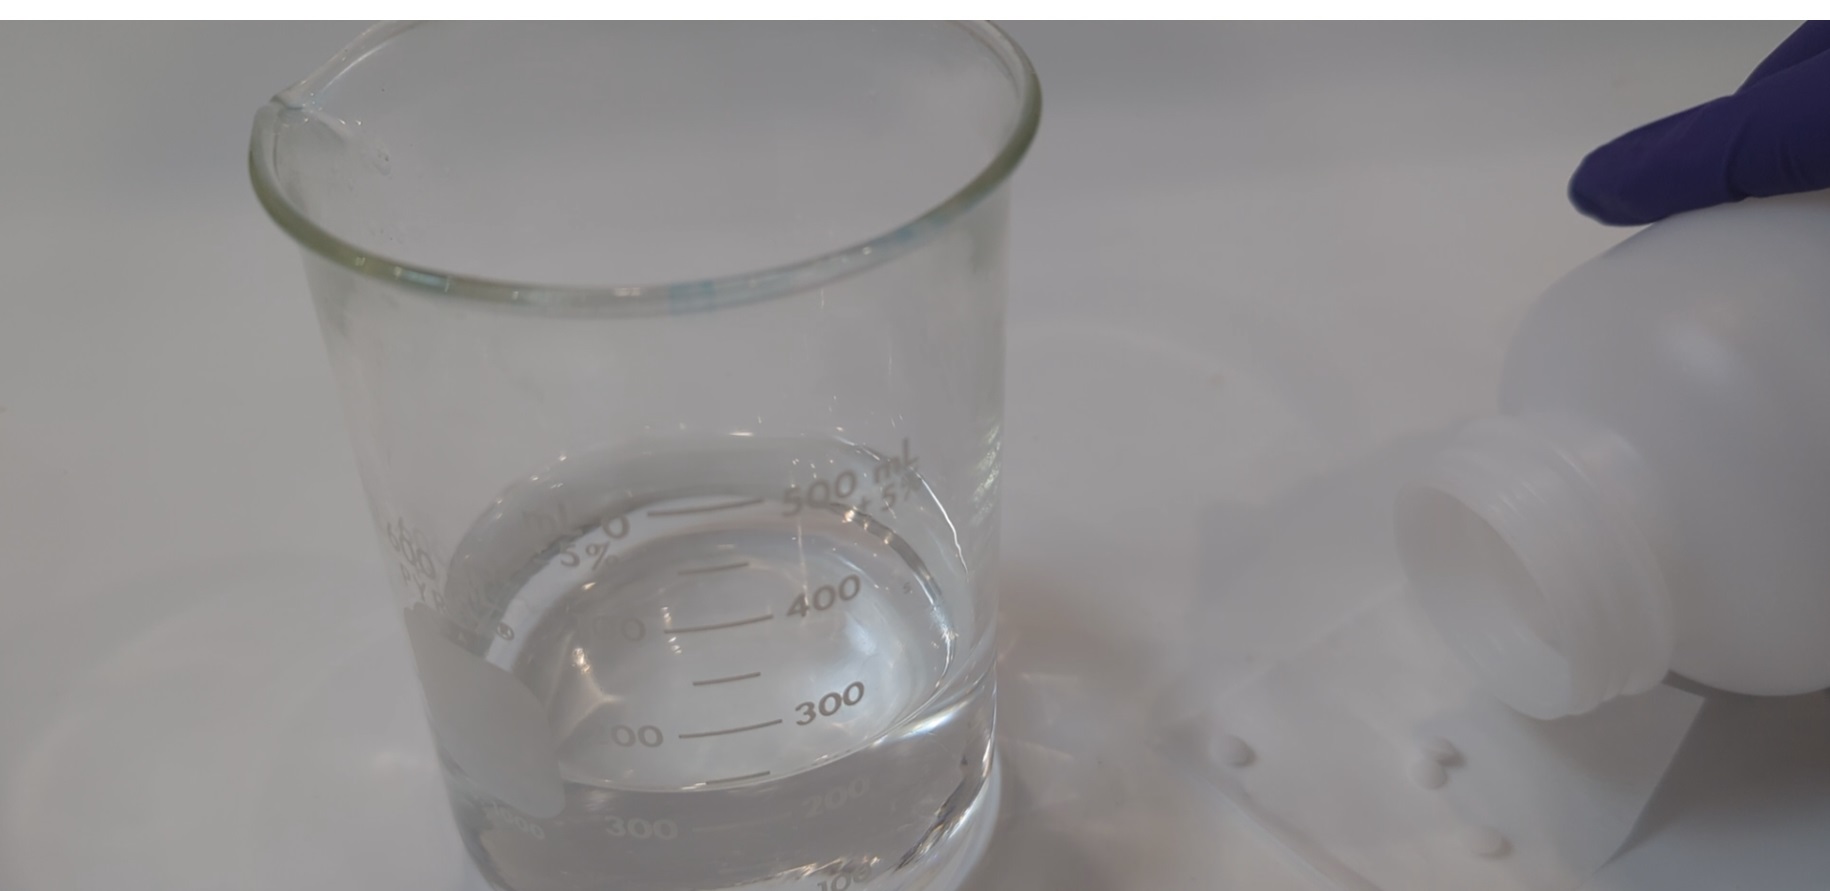
Once both staining stages are complete, you are ready for the final phase. In this step, the specimen is transitioned from a pure KOH solution to a low-concentration glycerin-KOH mixture, and then gradually moved to a high-concentration glycerin solution. This process also allows any residual, non-fixed red dye to gradually leach out.
The specimen will eventually be preserved in pure glycerin. When sealing the storage container, it is recommended to add just enough glycerin to cover the specimen, leaving a small amount of air space to prevent the glycerin from leaking due to thermal expansion. If the scales on the specimen's surface begin to fall off, you can use tweezers to remove them at this time to achieve a more aesthetic appearance.
Step 12: Final Replacement with Pure Glycerin – Completion
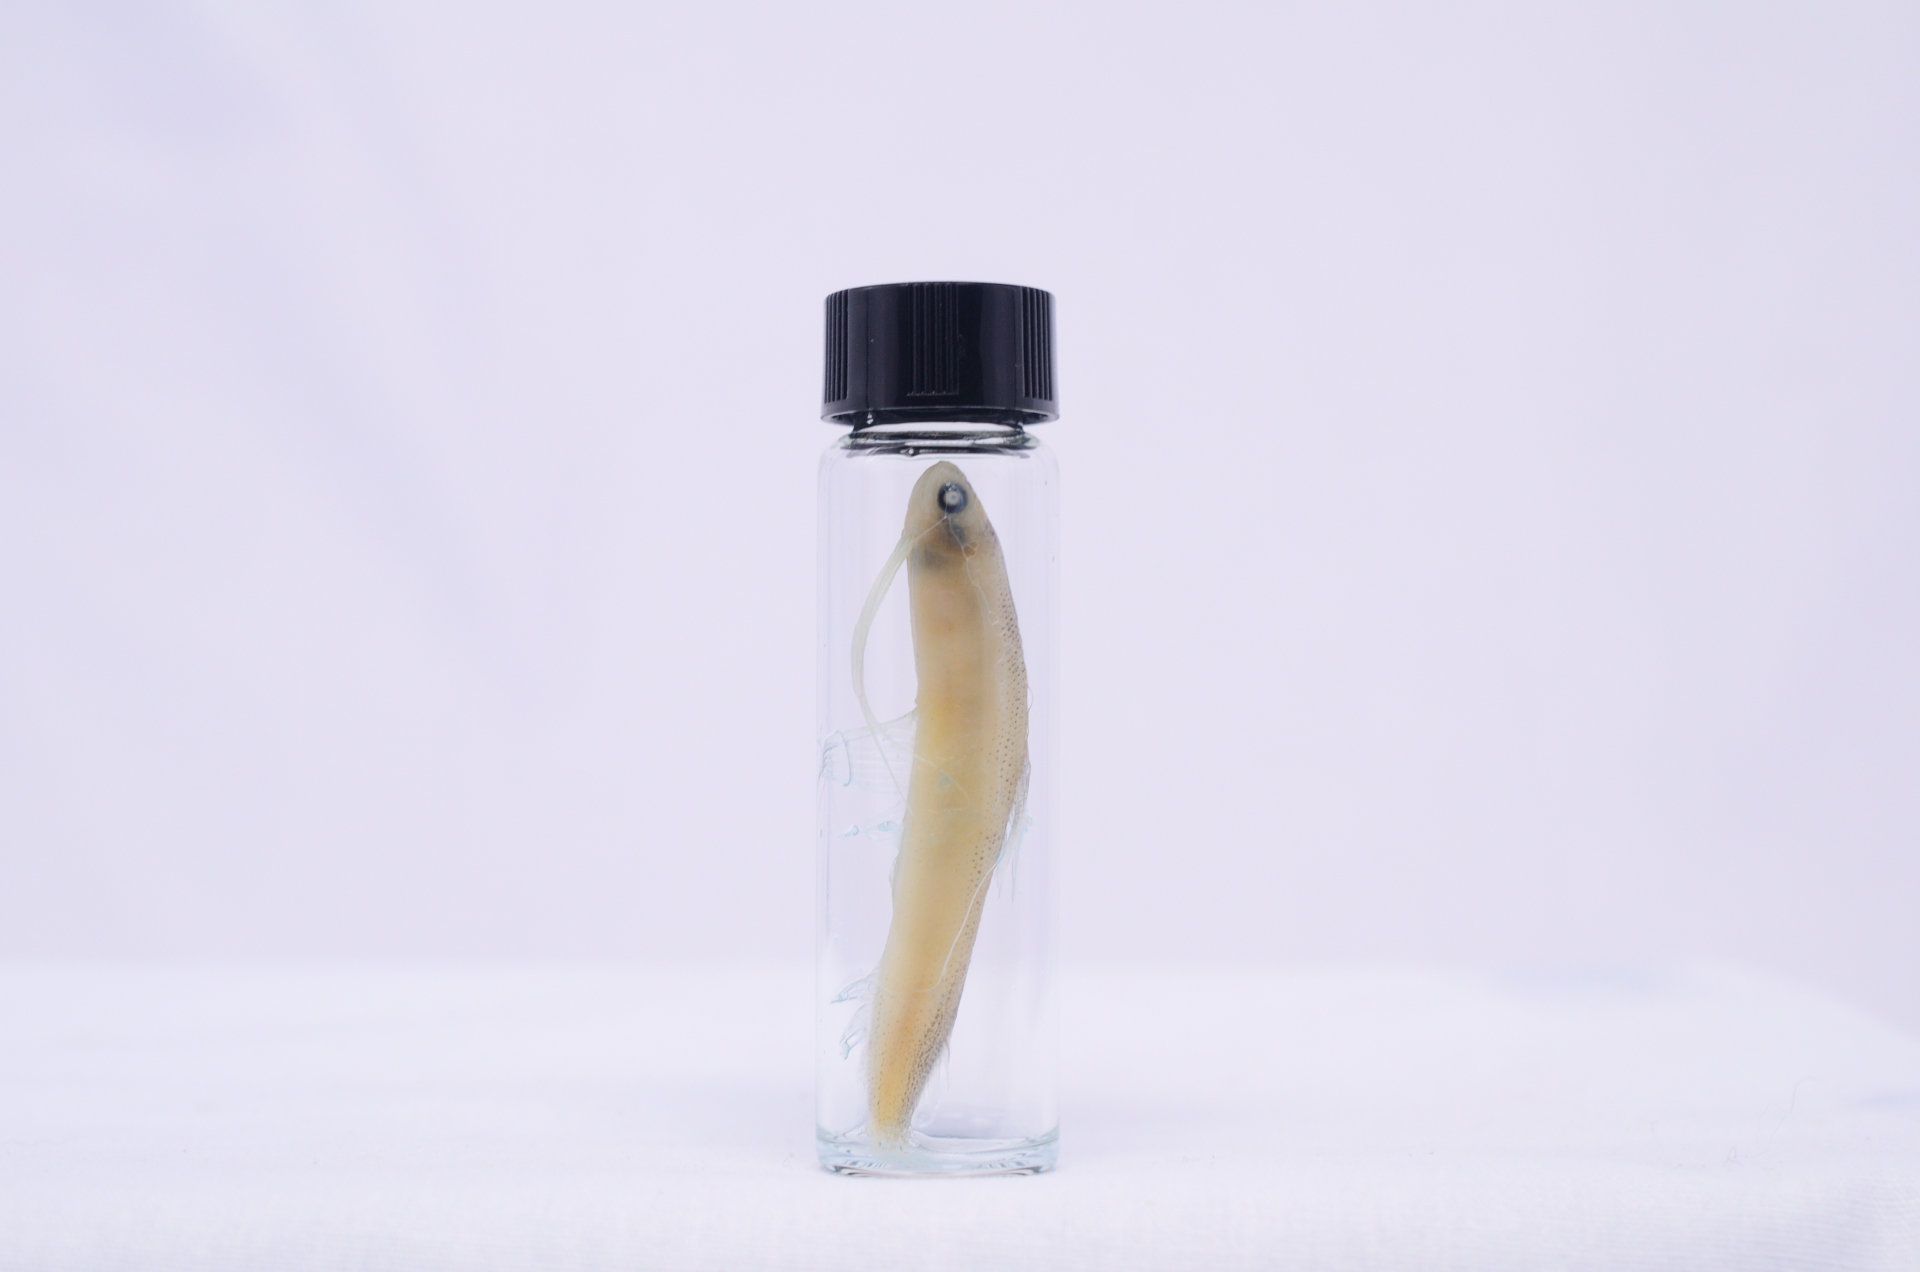
The specimen is finally preserved in pure glycerin. When sealing the container, we recommend adding just enough glycerin to fully submerge the specimen while leaving a small amount of headspace. This ensures that the glycerin does not leak out due to expansion caused by temperature fluctuations. If you notice scales gradually loosening from the surface, you may use tweezers to remove them to enhance the specimen's aesthetic appeal. Congratulations! You have successfully created your very own transparent biological specimen.
This concludes KAIRU’s tutorial on making transparent biological specimens. If you have any questions during the process, please feel free to reach out to us via the "Contact Us" section. We will do our best to assist you as soon as possible.
If reading this has sparked a desire to create your own transparent specimens, we invite you to purchase our "KAIRU's marine Lab: Transparent Specimen DIY Kit" (with four different species to choose from). We also offer a "Special Edition Transparent Specimen Kit" designed for those who wish to prepare and process their own specimens. Start your journey into this fascinating world today!